Bug Severity

Bug Severity in Orangescrum Cloud helps you classify how critical or impactful a bug is to your system, functionality, or end users.

It indicates the technical seriousness of a defect — whether it blocks key features, causes minor inconvenience, or is simply cosmetic.

By defining bug severities, teams can prioritize fixes effectively, ensure faster turnaround for critical issues, and maintain product quality through consistent classification.

Example: A crash on the login page would be tagged as High Severity, while a typo in a tooltip may be Low Severity.

Why Define Bug Severity

  • Prioritize fixes smartly — focus first on issues that affect business-critical functionality.
  • Standardize QA reporting — ensure all team members use consistent severity levels.
  • Improve visibility — generate better defect analytics and release dashboards.
  • Optimize time management — align developer effort with real system impact.

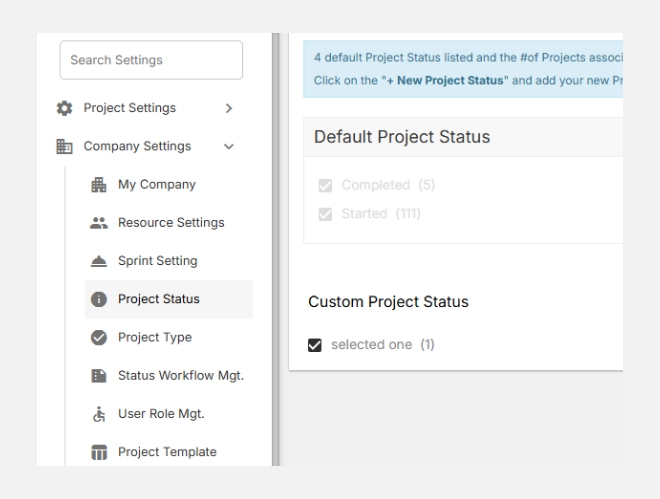
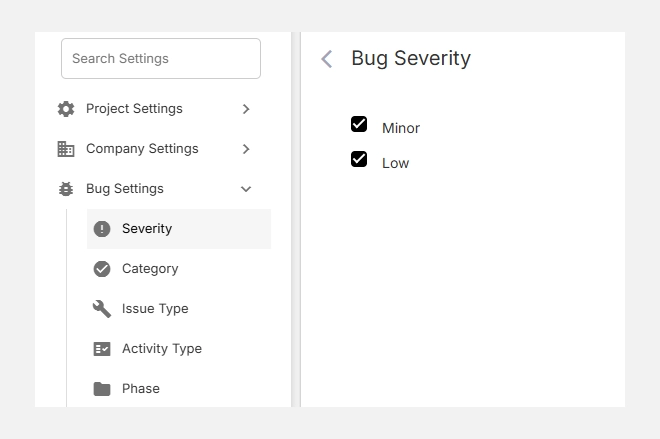
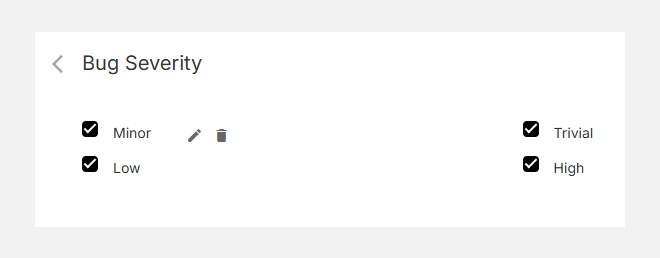
Accessing Bug Severity

  1. Navigate to Settings → Bug Settings → Severity.
  2. You’ll see a list of existing severity levels such as Trivial, Minor, Medium, High, etc.
  3. You can enable, disable, or add new severity types as needed.

Accessing bug severity

Default Severity Levels

Severity Description Typical Example
Trivial Very minor issue with no functional impact. Spelling error, UI alignment.
Minor Small problem that does not block normal operation. Misaligned label, minor color issue.
Medium Noticeable defect affecting a secondary feature. Sorting issue in a report, minor data mismatch.
High Major issue affecting primary functionality but with a workaround. Broken workflow, incorrect calculations.
Critical (custom) Severe defect that blocks core functionality or causes system failure. Application crash, data corruption.

Note: Severity levels can be customized to match your organization’s QA or release policies.

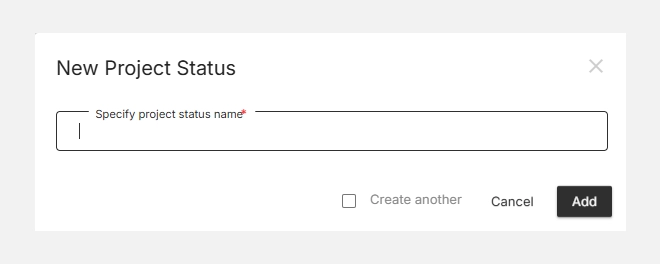
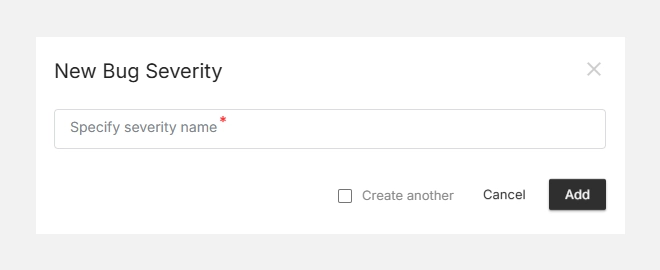
Adding a New Severity Level

  1. Click + New Bug Severity (top-right corner).
  2. Enter a clear and concise Severity Name (e.g., Critical, Blocker, Cosmetic).
  3. Click Add to save your new severity.
  4. The new level will now appear in your list and be available while reporting bugs.

Adding a new severity level

Editing or Deleting Severities

  • To Edit, hover over a severity and click the edit icon to rename or update it.
  • To Delete, click the trash icon to remove unwanted levels.
  • Changes are applied instantly across all projects using that configuration.

Editing or deleting severities

Note: Removing a severity will unassign it from existing bugs but will not delete those bug records.

Bug Settings

The Bug Settings section in Orangescrum Cloud gives you full control over how issues and bugs are categorized, tracked, and resolved within your projects.

Here, workspace admins can define custom attributes — such as Severity, Category, Issue Type, Root Cause, and Resolution — to standardize bug reporting and ensure consistency across teams.

By tailoring these settings to your workflow, you can streamline your QA process, improve collaboration between testers and developers, and gain better visibility into defect patterns and priorities.

Example: QA teams can classify bugs by severity (Critical, Major, Minor), track affected versions, and record root causes to prevent recurring issues.

Why Use Bug Settings

  • Standardize issue tracking across all projects and teams.
  • Prioritize effectively with clearly defined severity and categories.
  • Enable detailed analysis by linking bugs to causes, versions, and resolutions.
  • Customize your workflow to match your QA, UAT, or production process.
  • Improve reporting accuracy for bug trends, fix rates, and release quality.

Accessing Bug Settings

  1. Go to Settings → Bug Settings.
  2. You’ll find configurable sections such as:
    • Severity – Define the impact level of a bug.
    • Category – Classify bugs based on functionality or module.
    • Issue Type – Specify the type of defect (e.g., Bug, Enhancement, Request).
    • Activity Type – Track related test or development activities.
    • Phase – Identify which stage (UAT, QA, Production) the issue occurred in.
    • Root Cause – Record the underlying cause for process improvement.
    • Fix Version / Affect Version – Link defects to release versions.
    • Origin – Capture where the issue originated.
    • Resolution – Document how the issue was fixed or handled.

Timesheet Settings

The Timesheet Settings section in Orangescrum Cloud allows you to configure who approves team timesheets within your workspace.

This ensures that all logged hours — whether for tasks, projects, or clients — go through an approval process before they are finalized for reporting or invoicing.

By defining Timesheet Approvers, organizations can maintain accuracy, accountability, and transparency in their time tracking and billing operations.

Example: A project manager can be set as the approver for their team’s timesheets, ensuring all time entries are reviewed before invoicing the client.

Why Use Timesheet Settings

  • Ensure accuracy: Validate work hours before billing or payroll.
  • Assign approvers: Designate who reviews and approves timesheets per project.
  • Maintain accountability: Keep track of who approved or rejected time entries.
  • Improve reporting: Only approved timesheets are included in cost and resource reports.

Accessing Timesheet Settings

  1. Navigate to Settings → Company Settings → Timesheet Settings.
  2. You’ll see a list of all existing approvers, along with their email addresses, approval status, and pending timesheets.

Understanding the Interface

Field Description
Name Displays the approver’s name and profile picture.
Email The approver’s registered email address in the workspace.
Pending Approvals Number of timesheets awaiting review from that approver.
Status Indicates whether the approver is Active or Inactive.
Action Allows you to edit or remove an approver.

Adding a Timesheet Approver

  1. In the Select Approver field, start typing the user’s name.
  2. Select the desired user from the dropdown list.
  3. Click Add Approver.

Once added, the user will appear in the list of active approvers and will begin receiving timesheet approval requests for relevant team members.

Note: Only Admins or authorized users can manage approvers in Timesheet Settings.

Managing Approvers

You can update, activate/deactivate, or remove approvers anytime:

  • Edit Approver: Update details or reassign approval rights.
  • Deactivate: Temporarily disable an approver without removing them.
  • Delete: Permanently remove a user from the approver list.

All changes reflect instantly across ongoing timesheet submissions.

Timesheet Approval Flow

  1. A team member submits their weekly or daily timesheet.
  2. The assigned approver receives a notification.
  3. The approver reviews the entries, validates hours, and approves or rejects them.
  4. Once approved, the time logs are automatically marked as billable (if applicable).

This workflow helps maintain precision in both client billing and internal project cost tracking.

With Timesheet Settings in Orangescrum Cloud, you can ensure that every logged hour is validated, every project remains transparent, and every invoice is backed by verified data.

Project Templates

The Project Template feature in Orangescrum Cloud allows you to create new projects quickly using predefined frameworks.

Instead of building each project from scratch, simply choose a template that matches your workflow — such as Scrum, Kanban, Bug Tracking, or Content Management.

Each template comes with built-in structures like task types, statuses, workflows, and permissions — helping your team get started faster and stay consistent across projects.

Example: A marketing team can start with the “Content Management” template to plan campaigns, while a software development team can use “Scrum” for sprint-based planning.

Why Use Project Templates

  • Save setup time — start projects instantly with pre-defined structures.
  • Maintain consistency — ensure all projects follow your standard workflows.
  • Built-in best practices — each template includes optimized settings for different project types.
  • Customizable — edit or extend any template to match your organization’s needs.

Accessing Project Templates

  1. Navigate to Settings → Company Settings → Project Template.
  2. You’ll see a library of available templates categorized by workflow type.
  3. Each template card displays a title, description, and a “Create Project” button.

Available Templates

Template Name Description Ideal For
Simple Do more than just “manage” — organize, assign, and track tasks easily. General project management
Scrum Create backlog items, manage sprints, and track progress visually. Agile software teams
Kanban Visualize work progress on boards with customizable statuses. Continuous delivery teams
Bug Tracking Capture, prioritize, and resolve issues using a structured workflow. QA and testing teams
Content Management Plan and release content with review and approval steps. Marketing, editorial teams
Task Tracking A minimal To-Do–based project structure for small teams. Personal or lightweight team projects
Recruitment Manage hiring stages from job posting to onboarding. HR and recruitment teams
Procurement Track procurement from RFP to order completion. Operations and purchase departments

Each template is designed to fit specific business use cases while remaining flexible enough to customize.

Creating a New Project from a Template

  1. Choose a template that suits your workflow.
  2. Click “Create Project.”
  3. Enter your project details (name, start/end date, members, etc.).
  4. Review the predefined setup — including workflow, task types, and permissions.
  5. Click Save to launch your project instantly.

Your new project will now include all the template’s preloaded configurations — ready to go from day one

Customizing Project Templates

You can tailor existing templates or create new ones to fit your company’s unique processes.

Common customizations include:

  • Adding new task types or labels
  • Adjusting workflow statuses
  • Editing automation rules
  • Assigning role-based permissions

Tip: Use custom templates for repeating project types like client onboarding, product releases, or marketing campaigns.

User Role Management

The User Role Management feature in Orangescrum Cloud allows workspace admins to define, group, and manage different roles within your organization — ensuring clarity of responsibility and structured collaboration across projects.

Instead of assigning permissions individually for every user, you can create Role Groups (like Engineering Team or QA Team) and define specific roles within each group (such as Frontend Developer, QA Lead, or Project Manager).

Example: You can create a “Marketing Team” group and define roles such as Campaign Manager, Content Writer, and SEO Analyst — each representing a clear position within the team.

Why Use User Role Management

  • Better organization — structure your workspace by departments or teams.
  • Role clarity — every team member knows their position and assigned duties.
  • Streamlined project setup — quickly assign predefined roles to new users.
  • Consistency across projects — maintain uniform role definitions across the company.
  • Simplified reporting — analyze productivity and workload by role.

Accessing User Role Management

  1. Navigate to Settings → Company Settings → User Role Mgt.
  2. You’ll see a categorized list of existing Role Groups (such as QA, Engineering, Project Manager, etc.) along with their respective roles.

Understanding Role Groups

A Role Group represents a department, discipline, or function within your organization (e.g., QA Team, Project Managers, Engineering, Marketing).

Each Role Group contains multiple Roles, which define specific positions within that group.

Example Setup:

Role Group Roles Inside
QA Sr. QA Manager, QA Lead, QA Engineer
Project Management Project Manager
Engineering Team Backend Lead, Frontend Developer, Full-Stack Developer
DevOps DevOps Engineer

This grouping makes it easier to add or remove roles and assign them to users as your team grows.

Adding a New Role Group

  1. Click the “+” icon beside any section to add a new role group.
  2. Enter a descriptive group name — e.g., Design Team or HR Department.
  3. Click Save.

Your new Role Group will now appear in the list and can have roles added under it.

Adding a Role Within a Group

  1. Click the “+” icon inside the chosen Role Group (e.g., QA or Engineering).
  2. Enter the Role Name — such as Automation Tester, Content Strategist, or UI Designer.
  3. Optionally, assign users immediately or leave it empty for future assignment.
  4. Click Save.

Your new role will appear nested under the selected Role Group.

Editing or Deleting Roles

  • Click the Edit icon beside a role to rename or update it.
  • Use the Delete icon to remove a role that’s no longer needed.
  • You can also assign users directly to a role by clicking the User icon.

Note: Deleting a role removes it from all linked users, but it does not delete the users themselves.

Project Status Settings

The Project Status section in Orangescrum Cloud allows you to define how project progress is tracked across your organization.

Each project passes through different phases — from initiation to completion — and using clear, consistent statuses helps your team and stakeholders understand where each project stands.

Example: A marketing agency might use statuses such as “Planning,” “Execution,” and “Completed,” while a construction firm could have “Design Approval,” “Procurement,” and “Site Work.”

Why Use Project Status

  • Consistency: Maintain uniform progress stages across all projects.
  • Visibility: Instantly identify where each project stands.
  • Tracking: Simplify reporting and filtering by project status.
  • Customization: Tailor default statuses to match your team’s workflow.

Accessing Project Status Settings

  1. Go to Settings → Company Settings → Project Status.
  2. You’ll see two sections:
    • Default Project Status — Predefined system statuses like Started, Completed, On Hold, and Stack.
    • Custom Project Status — Statuses you can create based on your organization’s workflow.

Custom Project Status

Custom statuses allow you to define additional lifecycle stages unique to your company or domain.

For instance:

  • For a Legal Firm: File Organization, Trial Preparation, Case Closure
  • For a Software Company: Requirement Gathering, QA Review, Release Pending
  • For a Construction Team: Design Approval, Procurement, Site Execution

Each custom status provides greater control and visibility over specialized workflows.

Adding a New Project Status

  1. Click + New Project Status in the top-right corner.
  2. Enter the name of your new status (e.g., Client Review or Final Documentation).
  3. Click Add to add it to your list.

Your new status will appear under Custom Project Status and can be assigned to any active or future project.

Editing or Removing a Status

  • To rename or modify a custom status, click the status name and make your changes.
  • To remove a status, uncheck it or delete it from the list.
    (Default statuses cannot be deleted.)