The User Role Management feature in Orangescrum Cloud allows workspace admins to define, group, and manage different roles within your organization — ensuring clarity of responsibility and structured collaboration across projects.
Instead of assigning permissions individually for every user, you can create Role Groups (like Engineering Team or QA Team) and define specific roles within each group (such as Frontend Developer, QA Lead, or Project Manager).
Example: You can create a “Marketing Team” group and define roles such as Campaign Manager, Content Writer, and SEO Analyst — each representing a clear position within the team.
Why Use User Role Management
- Better organization — structure your workspace by departments or teams.
- Role clarity — every team member knows their position and assigned duties.
- Streamlined project setup — quickly assign predefined roles to new users.
- Consistency across projects — maintain uniform role definitions across the company.
- Simplified reporting — analyze productivity and workload by role.
Accessing User Role Management
- Navigate to Settings → Company Settings → User Role Mgt.
- You’ll see a categorized list of existing Role Groups (such as QA, Engineering, Project Manager, etc.) along with their respective roles.
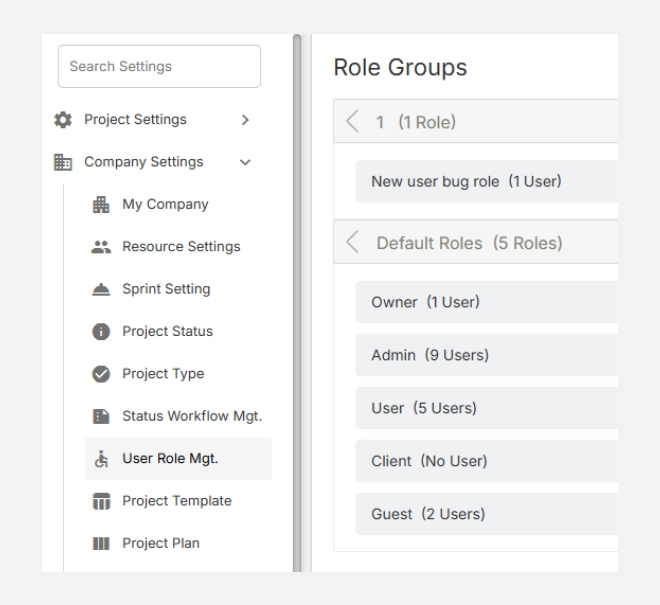
Understanding Role Groups
A Role Group represents a department, discipline, or function within your organization (e.g., QA Team, Project Managers, Engineering, Marketing).
Each Role Group contains multiple Roles, which define specific positions within that group.
Example Setup:
| Role Group | Roles Inside |
| QA | Sr. QA Manager, QA Lead, QA Engineer |
| Project Management | Project Manager |
| Engineering Team | Backend Lead, Frontend Developer, Full-Stack Developer |
| DevOps | DevOps Engineer |
This grouping makes it easier to add or remove roles and assign them to users as your team grows.
Adding a New Role Group
- Click the “+” icon beside any section to add a new role group.
- Enter a descriptive group name — e.g., Design Team or HR Department.
- Click Save.
Your new Role Group will now appear in the list and can have roles added under it.
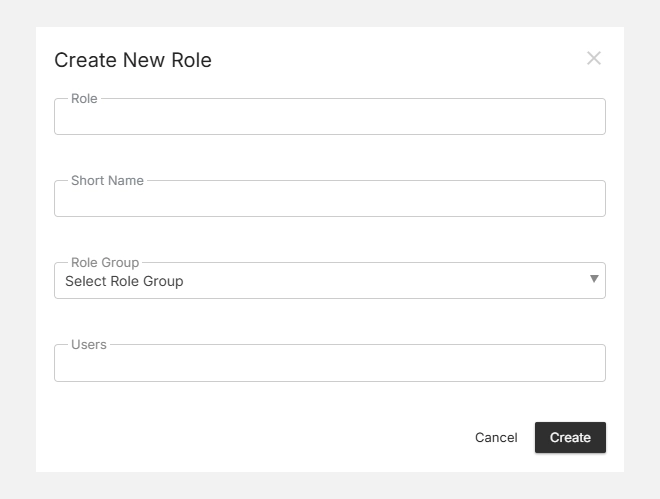
Adding a Role Within a Group
- Click the “+” icon inside the chosen Role Group (e.g., QA or Engineering).
- Enter the Role Name — such as Automation Tester, Content Strategist, or UI Designer.
- Optionally, assign users immediately or leave it empty for future assignment.
- Click Save.
Your new role will appear nested under the selected Role Group.
Editing or Deleting Roles
- Click the Edit icon beside a role to rename or update it.
- Use the Delete icon to remove a role that’s no longer needed.
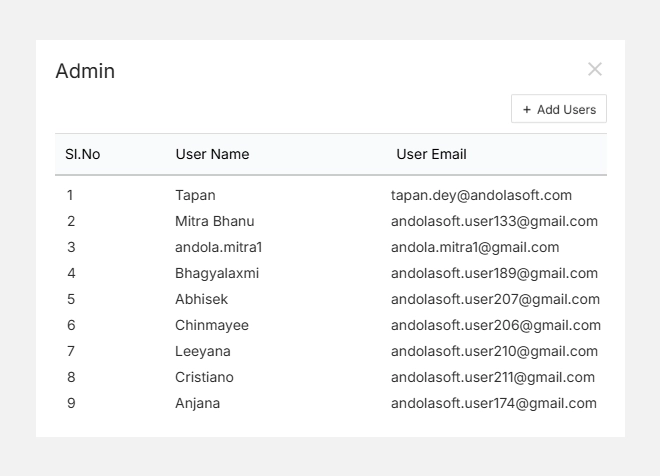
- You can also assign users directly to a role by clicking the User icon.
Note: Deleting a role removes it from all linked users, but it does not delete the users themselves.