This section focuses on optimizing your project finances and streamlining workflows for maximum efficiency. You’ll learn how to manage cost settings to track billable and internal rates, and leverage workflow automation to reduce repetitive tasks and maintain consistency across projects.
By setting up cost tracking and automation rules, your team can ensure financial transparency, improve productivity, and focus on high-priority work—making every project more profitable and organized.
Cost Settings
The Cost Settings module allows you to manage and control the financial side of your projects by defining user-wise billing rates.
Here, you can set the Cost to Client (billable rate) and Cost to Company (internal rate) for each team member, ensuring transparent and accurate project cost tracking.
Example: A designer might be billed at $60/hour to the client, while their internal cost to the company is $40/hour.
Why Use Cost Settings
- Track profitability — know how much you’re charging versus spending per project.
- Set accurate billing rates for each user, client, or department.
- Integrate with invoicing — automatically apply the correct rates during billing.
- Enhance project planning with real-time cost insights.
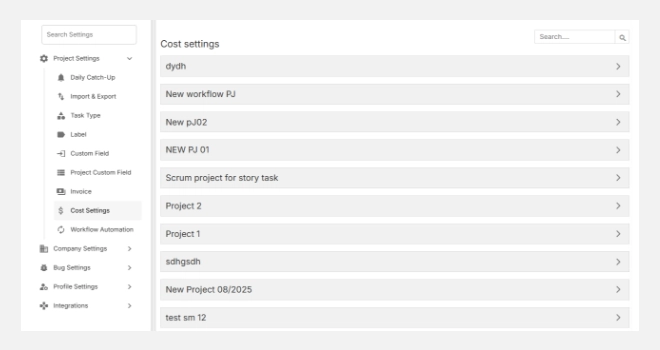
Accessing Cost Settings
- Navigate to Settings → Project Settings → Cost Settings.
- You’ll see a list of active projects with their associated cost configurations.
- Click on a project to view or update its user-level cost details.
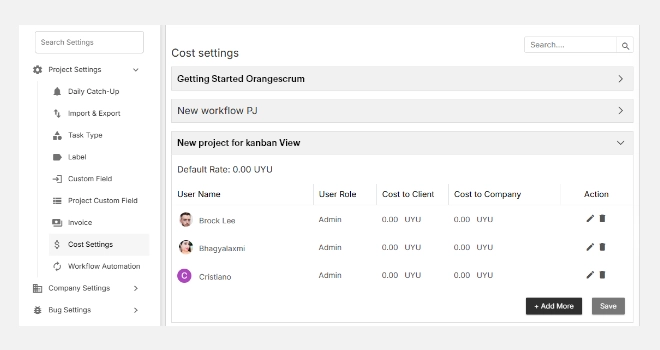
Setting Up Costs for a Project
1. Select a project (e.g., Orangescrum Dev, Health & Glow Content, Marketing Demo).
2. You’ll see a list of users assigned to that project.
3. For each user, define:
- Cost to Client: The rate charged to the client (billable).
- Cost to Company: The internal rate paid to the team member or used for cost analysis.
4. Click + Add More to include additional users.
5. Hit Save once all entries are added or modified.
Tip: Keep your cost rates standardized across similar projects to make performance comparisons easier.
Editing or Removing Cost Entries
- To edit, click the (Edit) icon next to a user’s rate.
- To delete, click the (Delete) icon to remove that entry.
- After any changes, click Save to apply updates.
Note: Edits to cost rates only affect new time logs and invoices; historical entries remain unchanged for data integrity.
Default Rate
At the top of each project, you’ll see a Default Rate value.
This serves as the fallback rate when a user does not have a specific “Cost to Client” value assigned.
Best Practice: Always define a Default Rate to ensure that no project time logs remain unbilled.
Multi-Project Management
Each project can have unique cost settings.
For example:
- “Web Development Project” → Hourly billing based on team roles.
- “Maintenance Project” → Fixed internal costs but variable client rates.
Switch between projects in the Cost Settings list to manage rates across your portfolio easily.
With Cost Settings, Orangescrum empowers you to manage financial transparency across projects — ensuring every hour is accounted for and every project stays profitable.
Workflow Automation
Workflow Automation in Orangescrum Cloud helps you save time and maintain consistency by automating repetitive actions.
Instead of manually updating tasks or sending reminders, you can set up rules that automatically trigger based on specific conditions — like changing task status, assigning users, or updating due dates.
Example: When a task’s status changes to “Completed,” automatically notify the project manager and update the “Progress” field.
Why Use Workflow Automation
- Reduce manual effort — let Orangescrum handle repetitive steps for you.
- Improve productivity — automate transitions, notifications, and updates.
- Maintain consistency — ensure uniform behavior across similar projects.
- Enhance communication — send instant alerts when conditions are met.
Accessing Workflow Automation
- Go to Settings → Project Settings → Workflow Automation.
- You’ll see a simple, three-step setup wizard:
- Choose Type
- Set Conditions
- Define Actions
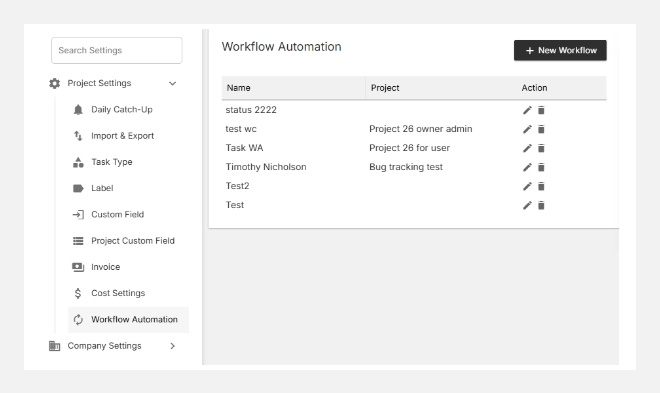
Creating a New Workflow Automation
Follow these steps to create your first automation:
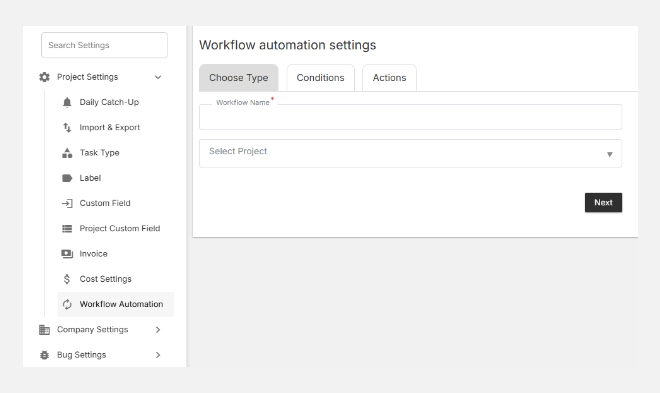
Step 1: Choose Type
- Click Workflow Automation → + New.
- Enter a Workflow Name (e.g., Task Status Update, Client Review Notification).
- Select the Project for which this automation applies.
- Click Next to proceed.
Step 2: Define Conditions
This is where you decide when the automation should trigger.
You can set conditions based on project or task attributes, such as:
- When a task status changes (e.g., “In Progress” → “Completed”).
- When a task is assigned or reassigned.
- When a due date is reached.
- When a label or custom field is updated.
Tip: Combine multiple conditions to build complex rules — e.g., trigger only when a “High Priority” task is overdue and assigned to a specific team.
Step 3: Define Actions
Next, choose what should happen when the condition is met. Common actions include:
- Send notifications to specific users or teams.
- Change task status automatically (e.g., move to “Under Review”).
- Assign or reassign a user to the task.
- Update fields such as due date, label, or priority.
Once your action is defined, click Save to activate your workflow automation.
With Workflow Automation, Orangescrum turns repetitive actions into effortless processes — keeping your projects moving smoothly and your teams focused on what truly matters.