Project Settings in Orangescrum Cloud let you customize how projects function, track progress, and manage cost and automation across your workspace.
From defining task types and labels to setting up cost structures and automations, these settings help you streamline work and maintain consistency across all projects.
Daily Catch-Up
Keep everyone informed with automated daily summaries.
The Daily Catch-Up feature sends quick, structured email updates to team members summarizing:
- Tasks completed yesterday
- Tasks due today
- Upcoming deadlines or pending approvals
You can enable or disable daily catch-ups at the workspace or user level.
Tip: Use Daily Catch-Up for distributed teams to maintain visibility without scheduling extra meetings.
How It Works
- Navigate to Settings → Project Settings → Daily Catch-Up.
- Select the Project for which you want to enable daily updates.
- Set your preferred time for updates (end of the workday works best).
- Save your settings.
- Orangescrum will automatically send an email reminder to all project members each day.
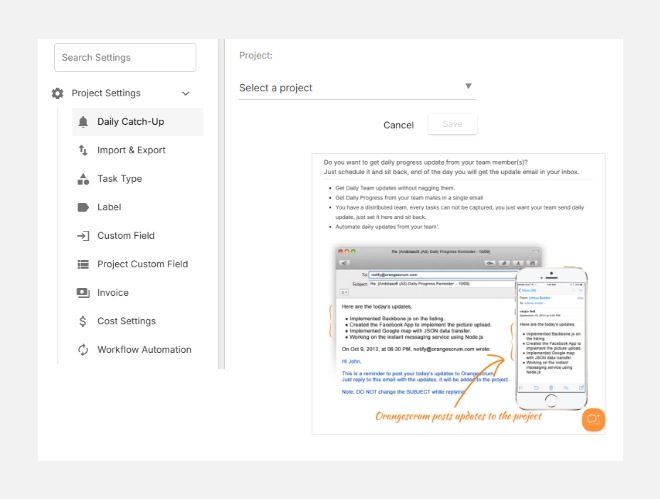
Each user can then reply directly to the email with their updates — no login required.
Orangescrum collects these responses and adds them to the corresponding project as a daily activity log, while also emailing a compiled report to the project manager or admin.
Import & Export
Seamlessly bring data into or out of Orangescrum.
- Import: Upload projects, tasks, or time logs via CSV templates.
- Export: Download task lists, reports, or time data for offline review or analytics.
View step-by-step guide to Import and Export.
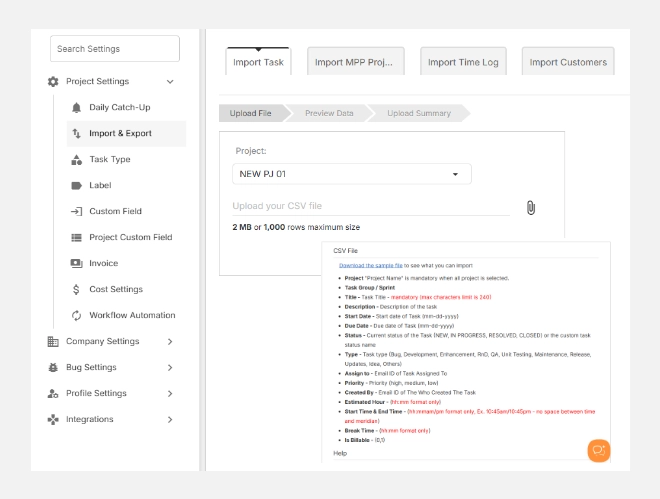
Best Practice: Use consistent column headers in CSV files to ensure smooth import mapping.
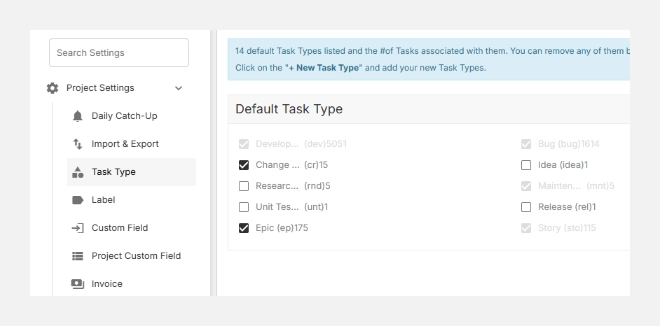
Task Type
Organize and categorize your work efficiently by defining custom task types for every project.
Task Types help you categorize and structure the different kinds of work your team performs.
They make it easy to group tasks, generate reports, and visualize project progress clearly.
In Orangescrum, you can use default task types (such as Development, Research, or QA) or create custom task types specific to your project needs.
Example: A software team may use “Bug,” “Feature,” and “Enhancement,” while a construction team might use “Inspection,” “Procurement,” and “Site Work.”
Why Task Types Matter
- Bring consistency to how your team defines work.
- Enable filtering and reporting by task category.
- Simplify automation and workflow triggers tied to task types.
- Improve resource and time analysis across projects.
Accessing Task Type Settings
- Go to Settings → Project Settings → Task Type.
- You’ll see a list of Default Task Types and Project-Level Task Types.
- Default types apply globally, while project-level types can be customized for specific projects.
Creating a New Task Type
To create a new custom task type:
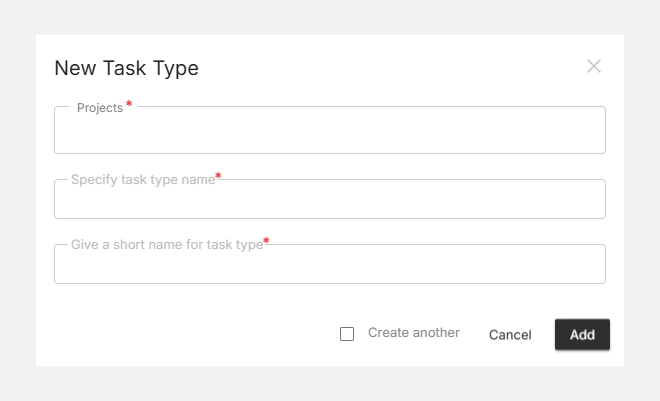
- Click + New Task Type (top right).
- In the pop-up form, fill in the following fields:
- Project: Select the project where this task type should apply.
- Task Type Name: Enter a clear name such as “Client Review” or “Testing.”
- Short Name: Provide a short label or code (e.g., rev or test) for easy identification.
- (Optional) Tick Create another if you wish to add multiple types consecutively.
- Click Add to save.
Your new task type will now appear under the respective Project-Level Task Type list.
Tip: Keep task type names short and descriptive to maintain clean reports and filters.
Editing or Deleting Task Types
You can easily modify or remove existing task types:
- Hover over a task type and click the edit icon to rename or update details.
- Use the delete icon to remove unused or duplicate types.
- Changes are instantly reflected across the project.
Note: Deleting a task type will remove its association from existing tasks but won’t delete the tasks themselves.