Moving project data from one tool to another can feel like a nightmare. Hours of manual entry, mismatched columns, broken timelines… It’s not fun.
This is where Orangescrum Imports makes things easy!
With Imports, you can bring everything over — Milestones, Sprints, Epics, Features, Stories, Tasks, Subtasks, Estimations, Due Dates, Timelogs, Project Plans, Templates, Budgets, Test Cases, and more — without typing it all in again. Just upload a file, and Orangescrum does the heavy lifting for you.
Sounds good? Let’s walk through it.
Why Use Orangescrum Imports?
Think about it:
- You don’t need manual typing, which saves hours of boring data entry.
- Onboarding is easy, so you can get started quickly with ready projects.
- Bulk upload lets you move thousands of tasks in just minutes.
- The process ensures accuracy by reducing human errors with a clean, pre-formatted template.
- Your project data stays consistent and neatly aligned with Orangescrum’s structure.
- You get flexibility to migrate from spreadsheets, tools, or even databases.
- The system scales with you, whether you’re importing one project or an entire portfolio.
- Data consistency is maintained, keeping all your historical records intact.
- You save costs by reducing manual effort, errors, and rework.
- Time-saving imports let you focus on execution instead of setup.
- The process is future-proof since you can re-use templates whenever you want.
Whether you’re switching from another project management tool, moving away from messy spreadsheets, or setting up a brand-new workspace, Imports makes the process smooth.
What can you import to Orangescrum?
- Tasks
- Timelogs
- Customers
- Epics
- Test cases
- Task templates
Import Tasks
- Login to your Orangescrum account.
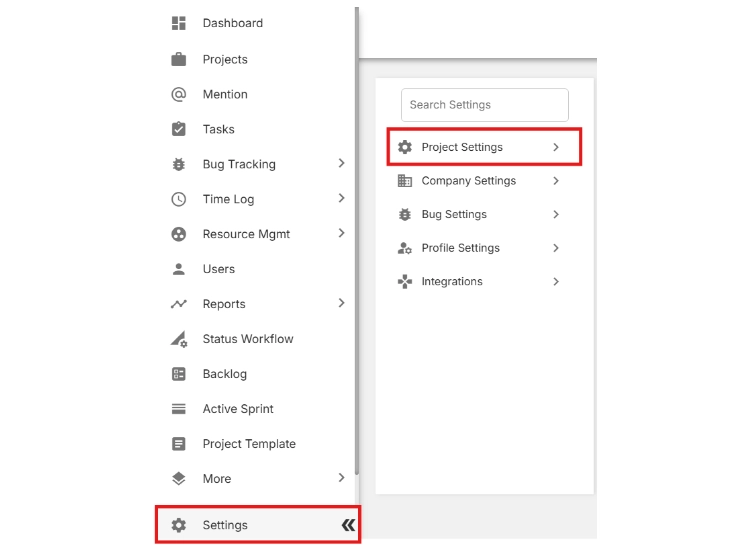
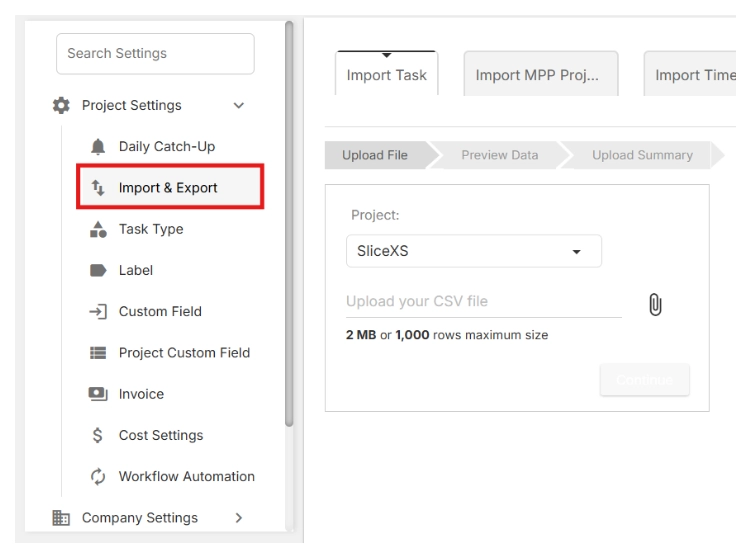
- From the left-side menu, scroll to the bottom and click Settings.
- Select Project Settings.
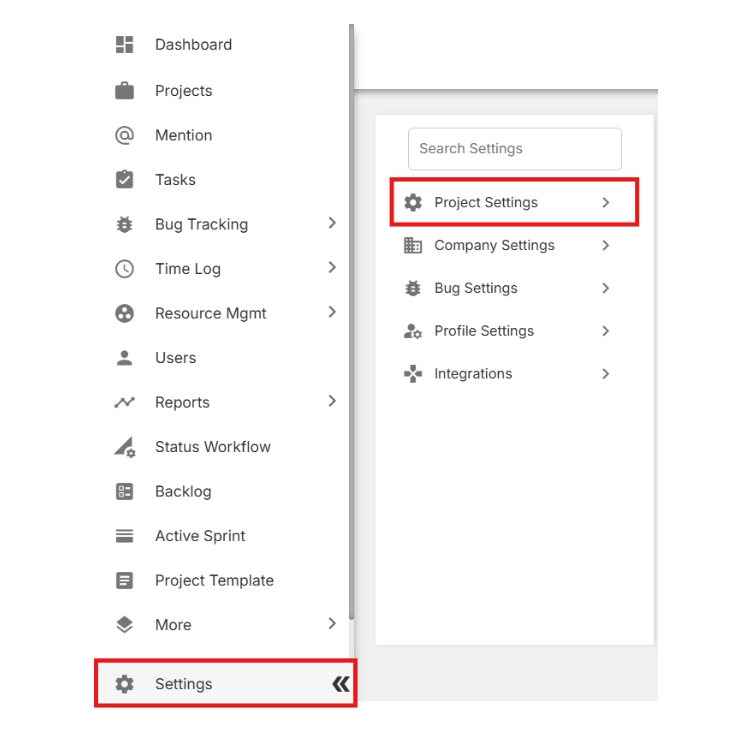
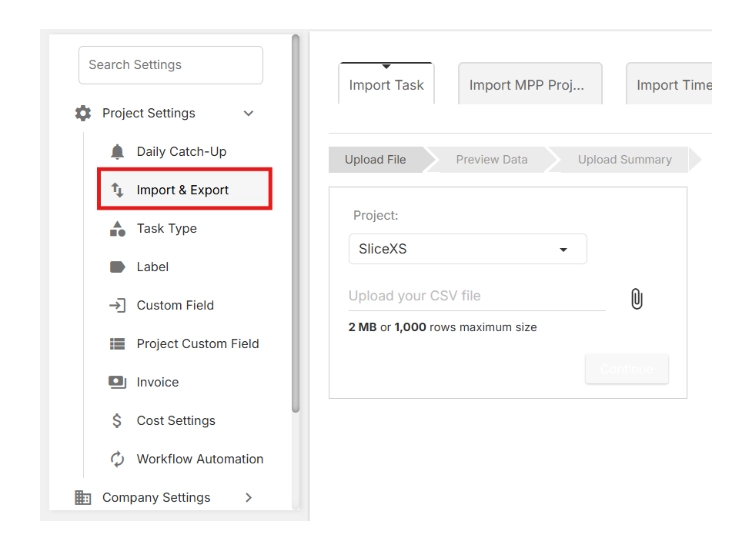
- Click on Import & Export.

🔎 This is where you can both download the import template and upload your project data later.
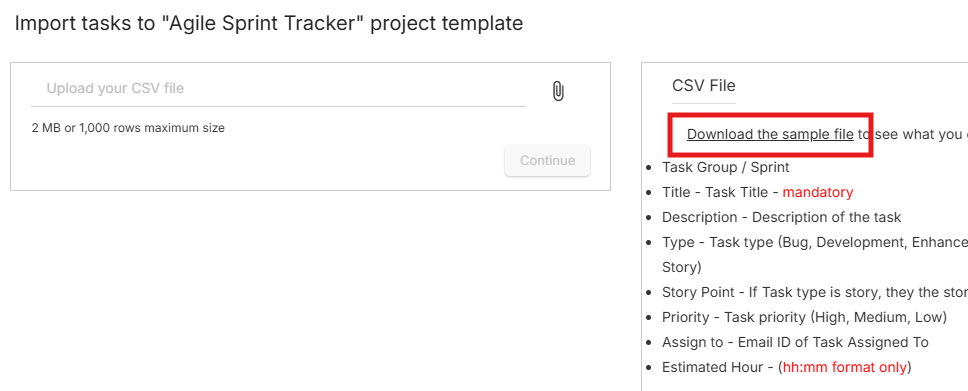
- Click Download the sample file.

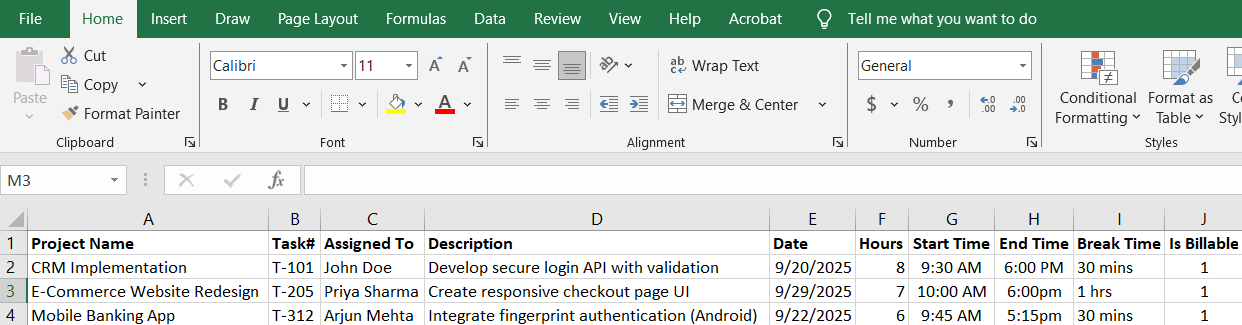
- Open the file in your spreadsheet application (e.g., Excel, Google Sheets).
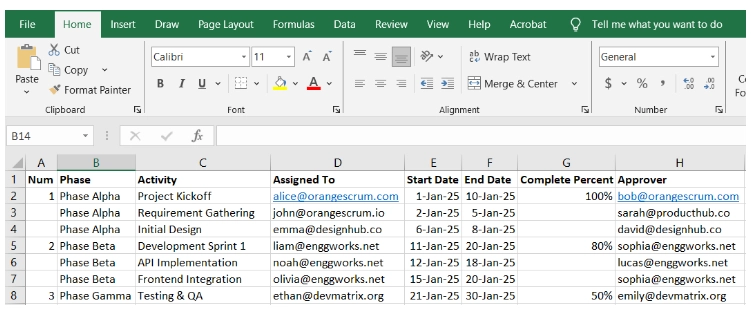
Complete the sample file with your project information. The file includes the following columns:
- Project
- Sprint
- Task#
- Parent
- Title
- Description
- Start Date
- Due Date
- Status
- Type
- Assigned To
- Priority
- Created By
- Estimated Hours
- Label
- Start Time
- End Time
- Break Time
- Is Billable
- Project Start Date
- Project End Date

Make sure your data matches the format provided in the sample file to avoid errors during import.
💡 Tip: Always start with this template to avoid formatting errors during the import process.
- Return to the Import & Export page.
- Click the Upload icon, then select your completed file.
- Click Continue.
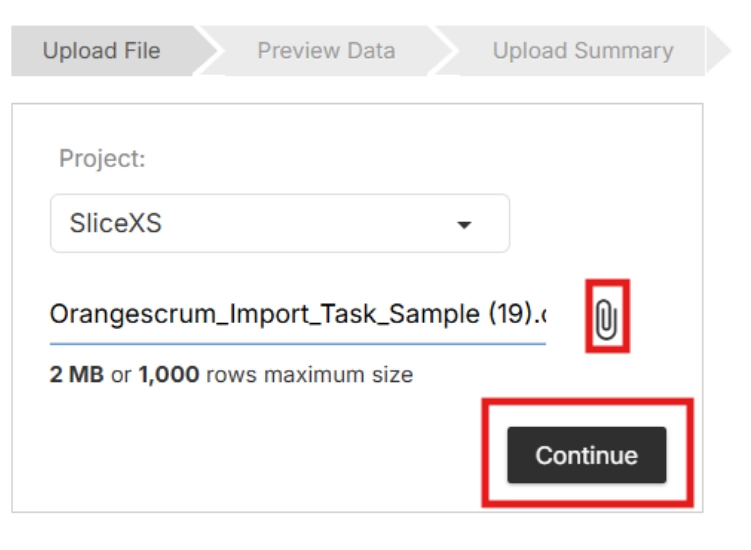
📂 Orangescrum will now validate your file to ensure the data is properly structured.
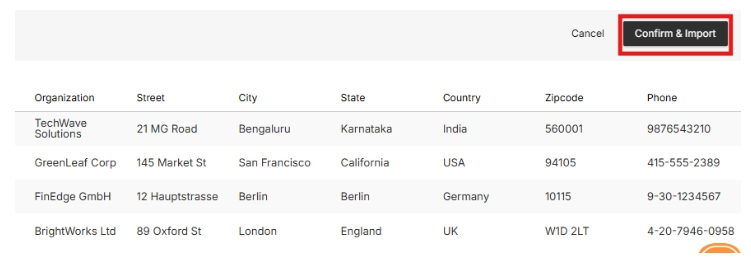
- Review the preview of your uploaded data.
- If everything looks correct, click Import to finalize.
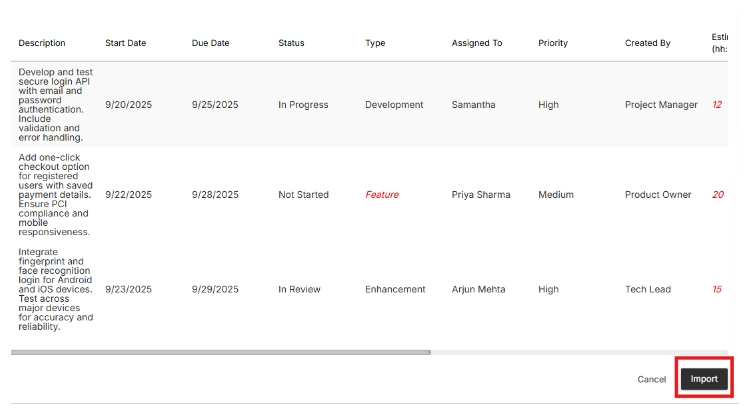
📂 Orangescrum will now validate your file to ensure the data is properly structured.
Import Timelogs
- Login to your Orangescrum account.
- From the left-side menu, scroll to the bottom and click Settings.
- Select Project Settings.

- Click on Import & Export.

- Click on the tab Import Time Log
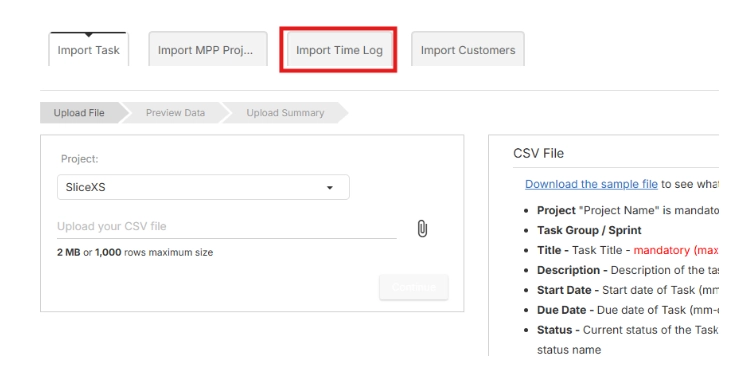
- Click Download the sample file.
- Open the file in your spreadsheet application (e.g., Excel, Google Sheets).
- Complete the sample file with your project information. It includes fields such as project name, task number, assigned to, description, date, hours etc.
Make sure your data matches the format provided in the sample file to avoid errors during import.
💡 Tip: Always start with this template to avoid formatting errors during the import process.
- Return to the Import & Export page.
- Click the Upload icon, then select your completed file.
- Click Continue.

📂 Orangescrum will now validate your file to ensure the data is properly structured.
- Review the preview of your uploaded data.
- If everything looks correct, click Import to finalize.

📂 Orangescrum will now validate your file to ensure the data is properly structured.
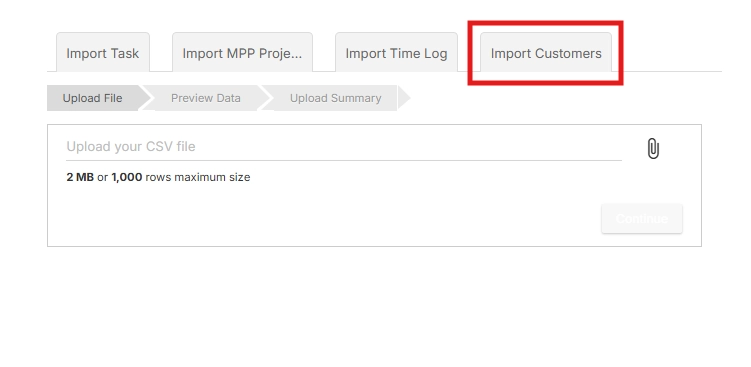
Import Customers
- Login to your Orangescrum account.
- From the left-side menu, scroll to the bottom and click Settings.
- Select Project Settings.
- Click on Import & Export.
- Click on the tab Import Customers
- Click Download the sample file.
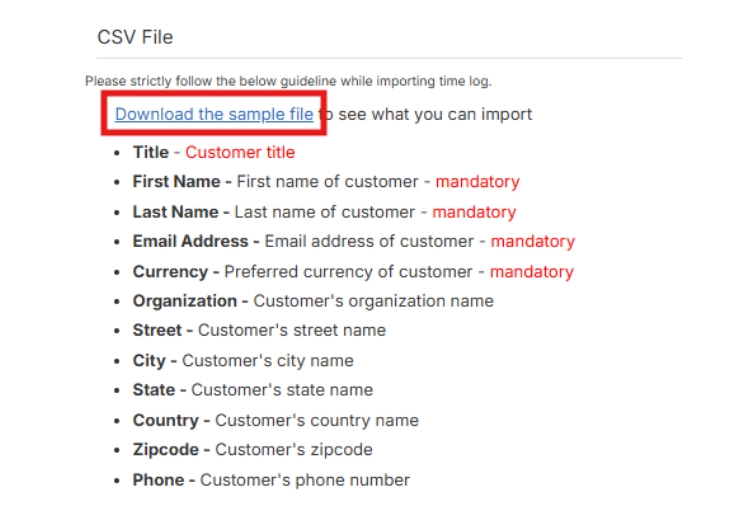
- Open the file in your spreadsheet application (e.g., Excel, Google Sheets).
- Complete the sample file with your project information. It includes fields such as project name, task number, assigned to, description, date, hours etc.
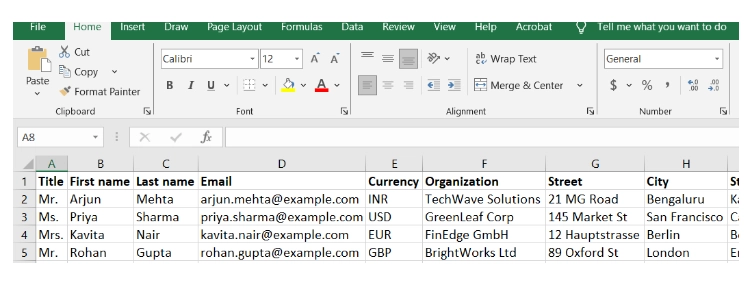
Make sure your data matches the format provided in the sample file to avoid errors during import.
💡 Tip: Always start with this template to avoid formatting errors during the import process.
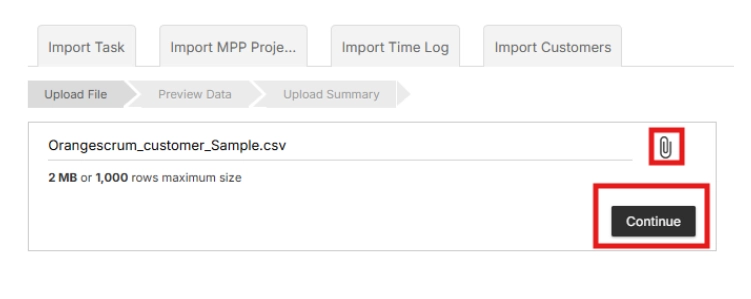
- Return to the Import & Export page.
- Click the Upload icon, then select your completed file.
- Click Continue.
📂 Orangescrum will now validate your file to ensure the data is properly structured.
- Review the preview of your uploaded data.
- If everything looks correct, click Import to finalize.
📂 Orangescrum will now validate your file to ensure the data is properly structured.
Import EPICs
- Login to your Orangescrum account.
- From the left-side menu, scroll to the bottom and click Settings.
- Select Project Settings.

- Click on Import & Export.
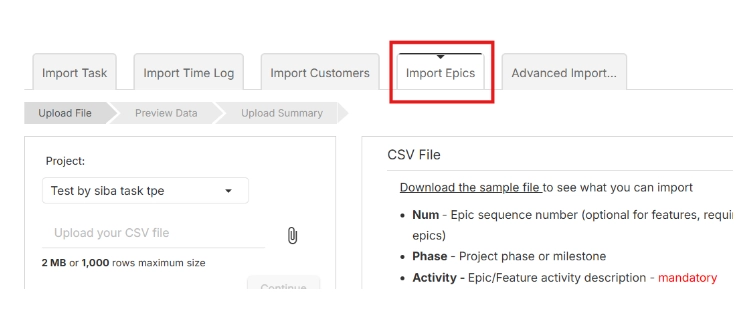
- Click on the tab Import Epics
- Click Download the sample file.
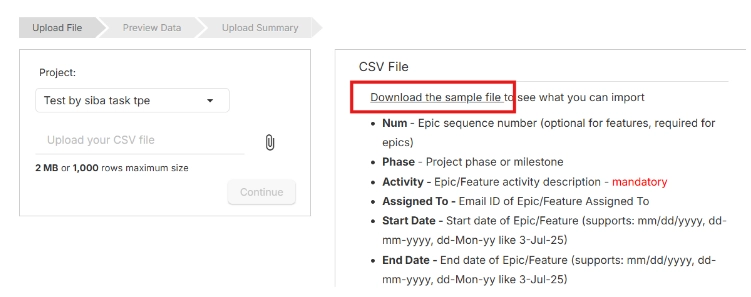
- Open the file in your spreadsheet application (e.g., Excel, Google Sheets).
- Complete the sample file with your project information. It includes fields such as project name, task number, assigned to, description, date, hours etc.
- Make sure your data matches the format provided in the sample file to avoid errors during import.
💡 Tip: Always start with this template to avoid formatting errors during the import process.
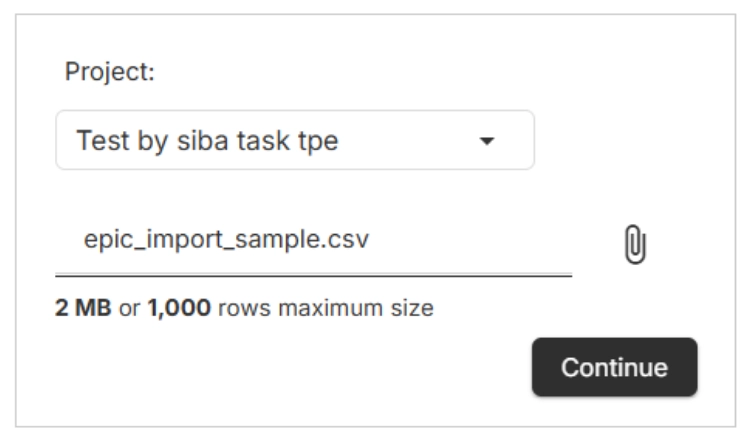
- Return to the Import & Export page.
- Click the Upload icon, then select your completed file.
- Click Continue.
📂 Orangescrum will now validate your file to ensure the data is properly structured.
- Review the preview of your uploaded data.
- If everything looks correct, click Import to finalize.
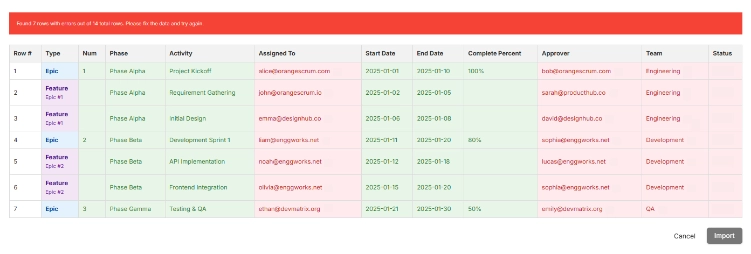
📂 Orangescrum will now validate your file to ensure the data is properly structured.
Import Test Cases
- Login to your Orangescrum account.
- From the left-side menu, and navigate to Test Management.
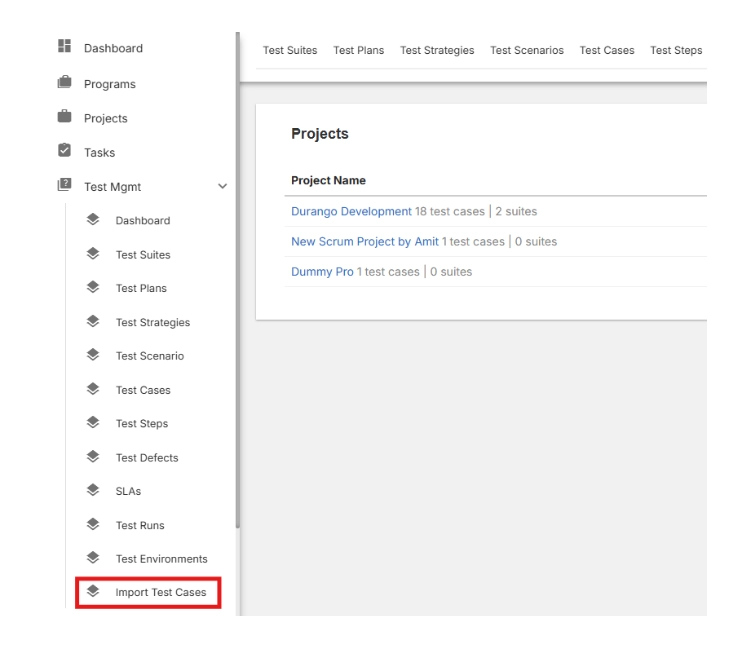
- From the dropdown click on Import Test Cases.
- Next click on Download the sample file.
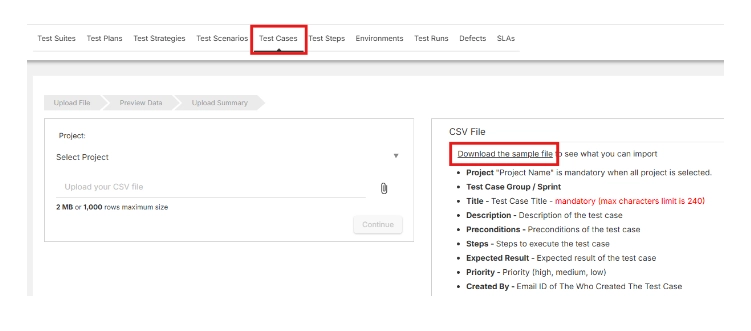
- Open the file in your spreadsheet application (e.g., Excel, Google Sheets).
- Complete the sample file with your project information. It includes fields such as project name, task number, assigned to, description, date, hours etc.
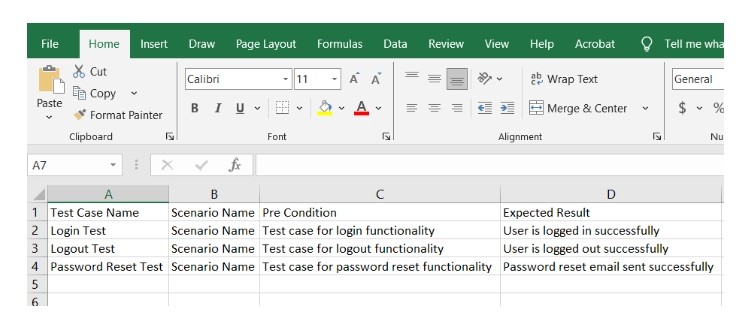
- Make sure your data matches the format provided in the sample file to avoid errors during import.
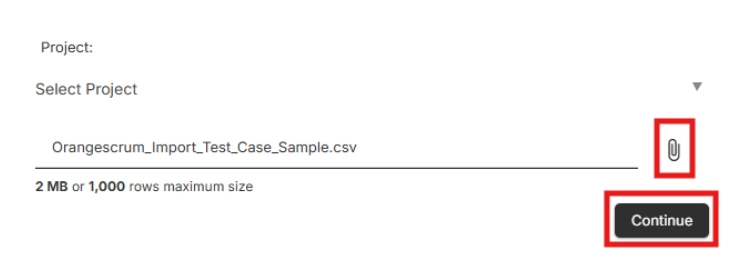
- Return to the Import & Export page.
- Click the Upload icon, then select your completed file.
- Click Continue.
📂 Orangescrum will now validate your file to ensure the data is properly structured.
- Review the preview of your uploaded data.
- If everything looks correct, click Import to finalize
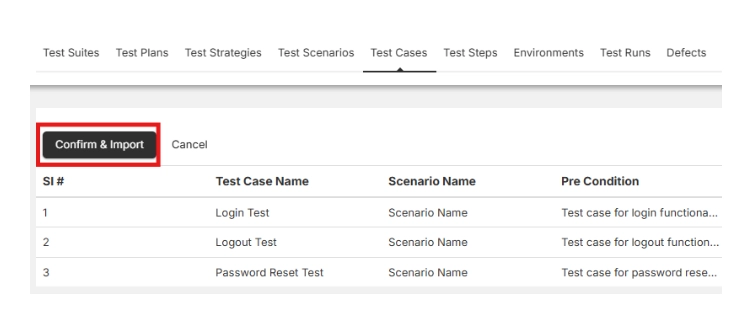
📂 Orangescrum will now validate your file to ensure the data is properly structured.
Import Project Templates?
- Login to your Orangescrum account.
- From the left-side menu, and navigate to Projects.
- From the top tabs click on Project Template.
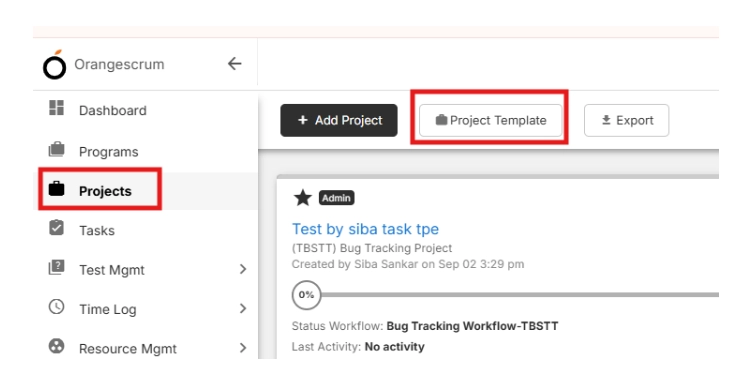
- Navigate to ‘+Template’ on the top right.
- Give a ‘Project Template’ name and a ‘Description’ → Click on Save & Continue

- On the top right corner click on Import Task

- Next click on Download the sample file.
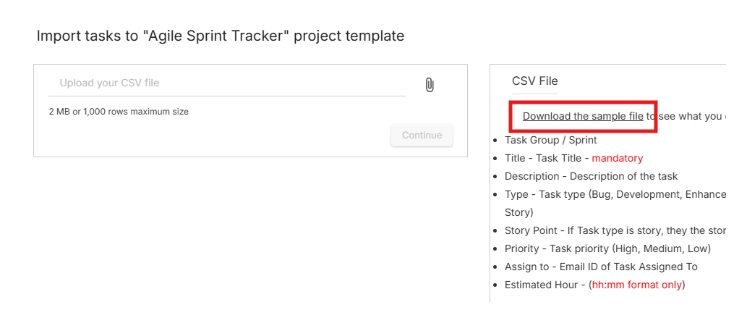
- Open the file in your spreadsheet application (e.g., Excel, Google Sheets).
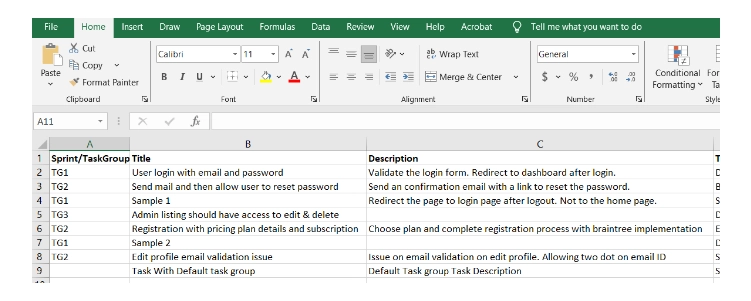
- Complete the sample file with your project information. It includes fields such as project name, task number, assigned to, description, date, hours etc.
- Make sure your data matches the format provided in the sample file to avoid errors during import.
- Return to the New Template page.
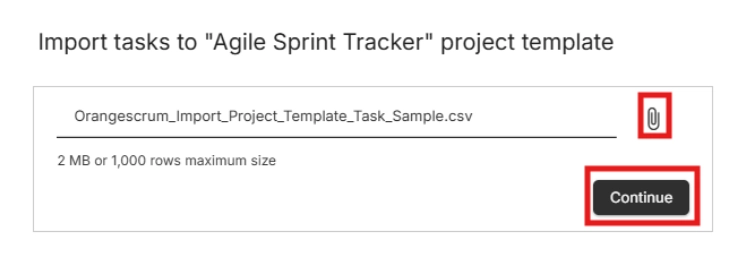
- Click the Upload icon, then select your completed file.
- Click Continue.
- In the next page click on Save
📂 Orangescrum will now validate your file to ensure the data is properly structured.
Other Ways to Import Data
Sometimes a file upload isn’t enough. That’s why Orangescrum also supports:
- API Import → Connect external tools directly. Perfect for automation.
- Database-to-Database Import → If you’re migrating from a legacy system, we can help map and transfer your data directly between databases.
- Third-Party Integrations → Use Zapier or other connectors to automatically sync data.
- Custom Migration Services → Our team can help if your setup is complex.
No matter how your data is structured, we’ve got a way to bring it in.
FAQs about Orangescrum Import
Q1. What type of data can I import into Orangescrum?
You can import milestones, sprints, epics, stories, tasks, subtasks, timelogs, budgets, project plans, templates, and even test cases.
Q2. Do I always need to use the sample file?
Yes. The sample file ensures your data follows Orangescrum’s format, preventing errors during import.
Q3. Can I import directly from Excel or Google Sheets?
Yes. Just fill the sample file using Excel or Google Sheets, save it, and upload.
Q4. Is there a data limit for import?
You can import large volumes of tasks and projects. For enterprise-scale imports, we recommend API or DB-to-DB migration.
Q5. Can I undo an import if I make a mistake?
Yes. You can delete imported projects or tasks and re-upload them correctly.
Q6. How do I import from another project management tool?
Export data from your old tool into CSV/Excel → Match it with Orangescrum’s sample file → Upload. For complex systems, use API or database migration.
Q7. Can I automate imports?
Yes. Using Orangescrum’s API or integrations like Zapier, you can automate imports and sync data regularly.
Q8. Will my task hierarchy (parent/child) be maintained?
Yes. The “Parent” column in the template ensures subtasks are linked correctly.
Q9. What happens if my file has errors?
Orangescrum will validate your file and point out issues before import, so you can fix them.
Q10. Can Orangescrum help with custom migrations?
Absolutely. If you’re moving from a legacy system or have unique requirements, our team can help with DB-to-DB imports or custom scripts.